 +86-13925515590
 kleinma@aliyun.com


Cover Glass Prototype Testing: What OEM Buyers Should Check Before Mass Production

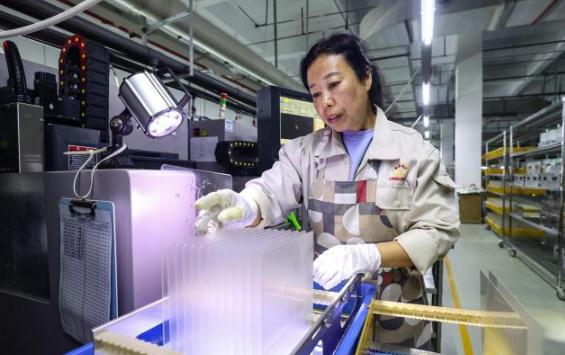
A cover glass sample can look correct on a workbench and still cause problems during product assembly.
A mounting hole may be slightly out of position. A printed border may not align with the display. An edge may interfere with the housing, or a coating may look different under the actual lighting conditions.
These issues are easier to identify during prototype development than after a production order has been released.
For OEM projects, cover glass prototype testing should compare the manufactured sample with the approved drawing, technical specifications and intended assembly conditions.
1. Confirm Dimensions and Glass Thickness
Dimensional inspection should be one of the first steps in prototype approval.
Check the sample against the latest approved drawing, including:
- Overall length and width
- Glass thickness
- Hole diameter and position
- Slots and cutouts
- Corner radius
- Edge dimensions
- Shape and profile
Do not check only the outside dimensions.
For example, a glass panel may have the correct overall size but still fail to fit because a mounting hole is positioned incorrectly.
The measurement method and reference points should also be agreed between the buyer and manufacturer.
For projects with narrow tolerances, review our information about custom cover glass tolerances.
2. Inspect the Edges and Machined Features
Edge quality can influence both assembly and product reliability.
During sample inspection, examine:
- Edge chipping
- Visible cracks
- Grinding marks
- Polished edge appearance
- Corner transitions
- Hole and cutout edges
If the glass is installed into a frame or enclosure, check the actual contact areas.
A glass sample should not be approved based only on its appearance when it is placed flat on a table.
Where possible, test the sample in the intended housing or assembly fixture. This can reveal interference, uneven gaps and positioning problems that are difficult to identify through dimensional measurements alone.
3. Check Printing and Graphic Alignment
Printed areas are often visible on the finished product, so appearance and positioning matter.
Compare the sample with the approved artwork.
Pay attention to:
- Printed border width
- Logo position
- Button and icon alignment
- Color appearance
- Ink coverage
- Pinholes or missing ink
- Contamination and printing defects
For transparent or partially printed designs, also check the viewing side and printing surface.
If color matching is important, define the approved color reference and evaluation conditions before sample approval. A screen image is not always a reliable reference for judging printed glass color.
4. Evaluate Surface Coatings
Cover glass may include anti-reflective, anti-glare or anti-fingerprint treatments.
Each treatment should be evaluated against its intended purpose.
AR coating
Check reflection appearance and the agreed optical performance requirements.
AG treatment
Check surface uniformity, haze and visual appearance under the intended lighting conditions.
AF treatment
Check fingerprint resistance, cleaning behavior and any agreed surface performance requirements.
Do not approve a coating simply because the glass looks acceptable under one lighting condition.
If the finished product will be used outdoors or under strong industrial lighting, test the sample in representative viewing conditions.
For more details, see our information on cover glass quality inspection.
5. Review Strengthening and Mechanical Requirements
Strengthening requirements should be verified according to the project specification.
Depending on the material and process, relevant requirements may include surface compressive stress, depth of layer, thickness and other agreed mechanical characteristics.
A visual examination cannot establish whether a chemically strengthened glass component meets its specified stress requirements.
Where mechanical performance is important, agree on the applicable test method, measurement location, sampling frequency and acceptance limits.
Do not assume that a generic hardness value or a single impact test proves compliance with every mechanical requirement.
For chemically strengthened glass, ASTM C1422/C1422M-26 provides a reference for evaluating surface compression and depth of compression. These measurements can help verify whether a sample meets its specified strengthening requirements.
6. Check Optical Appearance and Cleanliness
Optical quality is particularly important for cover glass installed in front of electronic displays.
Inspect the sample under controlled and repeatable lighting conditions.
Look for:
- Scratches and visible marks
- Bubbles or inclusions
- Surface contamination
- Uneven coating appearance
- Distortion or unwanted visual effects
- Printing defects in viewing areas
For display applications, it may also be necessary to check the appearance with the actual display operating behind the glass.
This can reveal reflection, color or visual uniformity issues that are not obvious when inspecting the glass separately.
7. Test the Sample in the Actual Assembly
A prototype should be checked in the environment where it will be installed.
Important assembly checks may include:
- Fit within the housing
- Alignment with the display
- Clearance around mounting holes
- Adhesive position
- Bonding area
- Gap consistency
- Touchscreen compatibility, where applicable
If adhesive tape or OCA lamination is required, check the bonding arrangement and inspect for bubbles, misalignment and other visible defects according to the approved requirements.
The assembly test should use the intended components and installation method wherever possible.
8. Record the Sample Approval Requirements
Once the sample has been evaluated, document the results.
A practical sample approval record may include:
| Inspection Item | Approval Reference |
|---|---|
| Dimensions | Approved technical drawing |
| Thickness | Specified glass thickness |
| Holes and cutouts | Drawing and measured positions |
| Edge quality | Agreed appearance criteria |
| Printing | Approved artwork and color reference |
| Coating | Agreed optical and surface requirements |
| Strengthening | Specified process and test requirements |
| Assembly | Actual housing or fixture |
| Appearance | Approved reference sample |
Keep the approved drawing, artwork, inspection records and sample identification together.
This gives the purchasing and manufacturing teams a common reference when production begins.
Frequently Asked Questions
Why is cover glass prototype testing important?
Prototype testing helps identify dimensional, appearance, processing and assembly problems before mass production. It reduces the risk of discovering design or manufacturing issues after a larger quantity has been produced.
What should be checked on a cover glass sample?
Check dimensions, thickness, holes, edges, printing, coatings, surface appearance, cleanliness, strengthening requirements and assembly fit according to the project specification.
Should the prototype and mass-produced glass use the same material?
They should follow the agreed material specification. Any material or process change should be reviewed and approved before production.
When should mass production begin?
Mass production should proceed after the relevant technical specifications, sample approval requirements and inspection criteria have been confirmed by the buyer and manufacturer.
Request a Custom Cover Glass Prototype Review
WM Cover Glass supports OEM glass projects based on customer drawings, samples and technical requirements.
If you are developing a new display or touchscreen product, send us your drawing, required thickness, dimensions and estimated quantity.
We can review the processing requirements, including CNC machining, strengthening, printing, coatings and inspection arrangements.
Explore our custom cover glass solutions or contact our team.